Set Up and Use Locked Folder in Google Photos on iPhone: Boost Your Privacy
Securing Your Memories: A Comprehensive Guide to Google Photos’ Locked Folder on iPhone
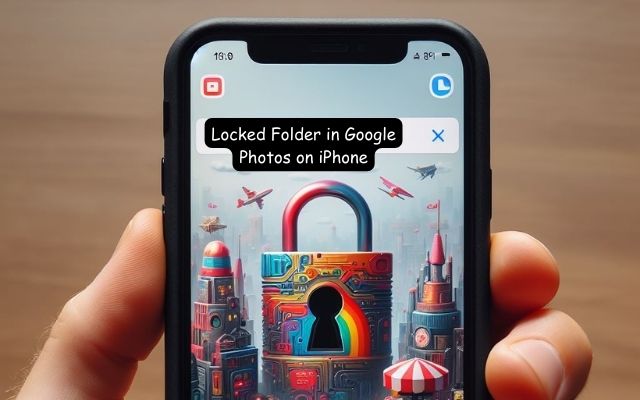
In the digital age, privacy is a commodity that everyone seeks but few truly understand. As we increasingly rely on our smartphones for capturing and storing precious moments, the need for secure and private storage solutions has never been greater. One such solution is the Locked Folder in Google Photos.
Google Photos, a popular photo management application, offers a plethora of features designed to make photo storage easy and convenient. However, its standout feature is arguably the Locked Folder. This feature provides an extra layer of security, allowing users to store their sensitive photos away from prying eyes.
The Locked Folder in Google Photos is more than just a password-protected album. It’s a testament to Google’s commitment to user privacy and data security. By enabling users to segregate their sensitive photos, Google Photos ensures that your private moments stay private.
Setting up and using the Locked Folder in Google Photos on your iPhone is a straightforward process. But, like any feature, it can be daunting for first-time users. This article aims to demystify the process and guide you through each step, ensuring you can confidently use the Locked Folder to enhance your privacy.
Stay tuned as we delve deeper into the world of Google Photos and its Locked Folder feature, a tool that truly puts you in control of your privacy.
Remember, in the realm of digital data, privacy is not a luxury, but a necessity. And with the Locked Folder in Google Photos, you’re one step closer to achieving it.
Understanding Google Photos
Google Photos, launched in 2015, has quickly become a go-to application for photo management. It offers a seamless experience for storing, organizing, and sharing photos across various devices. But what sets Google Photos apart is its commitment to user privacy and data security, embodied in features like the Locked Folder.
The application uses advanced machine learning algorithms to recognize people, places, and things in your photos, making it easier to search and organize your memories. You can create albums, share photos with friends and family, and even order photo prints directly from the app.
But the real magic of Google Photos lies in its cloud storage capabilities. By storing your photos in the cloud, you can access them from any device, anywhere, at any time. This convenience, however, raises valid concerns about privacy and data security.
Enter the Locked Folder, a feature designed to address these concerns. The Locked Folder in Google Photos is a secure, password-protected space where you can store sensitive photos away from your main photo library. These photos won’t appear when you scroll through Google Photos or when you share your device with others.
Now, we’ll delve deeper into the importance of privacy in Google Photos and how the Locked Folder feature plays a crucial role in safeguarding your memories.
Stay tuned as we unlock the power of privacy with Google Photos and its Locked Folder feature on your iPhone.
Remember, in the digital world, your photos tell your story. And with Google Photos, you have the power to control who gets to see that story.
The Importance of Privacy in Google Photos
In today’s digital age, privacy has become a paramount concern. With our lives increasingly documented through photos and videos, it’s essential to have control over who can access these personal memories. This is where Google Photos, with its Locked Folder feature, steps in.
Google Photos is not just a photo management app; it’s a tool that empowers users to take control of their digital privacy. The app understands that not all photos are meant for public viewing. Some moments are private, meant to be shared with select individuals, or perhaps, not shared at all.
This is where the Locked Folder feature shines. It provides a secure, password-protected space within your Google Photos library where you can store sensitive photos. These photos are hidden from your main library and won’t show up as you scroll through your photos or share your device with others.
But the Locked Folder is more than just a hidden album. It’s a testament to Google Photos’ commitment to user privacy. By providing a secure space for sensitive photos, Google Photos ensures that you have the final say over who sees your photos.
Now, we’ll guide you through the process of setting up and using the Locked Folder in Google Photos on your iPhone. We’ll provide step-by-step instructions, tips, and best practices to help you make the most of this powerful privacy tool.
Stay tuned as we delve deeper into the world of Google Photos and its commitment to privacy through the Locked Folder feature.
Remember, in the digital world, privacy is not a luxury, but a necessity. And with the Locked Folder in Google Photos, you’re one step closer to achieving it.
Introduction to the Locked Folder Feature
In the realm of digital privacy, Google Photos has made a significant stride with its Locked Folder feature. This feature, designed with privacy at its core, allows users to store sensitive photos in a secure, password-protected space within the app.
The Locked Folder is more than just a hidden album. It’s a secure vault for your most sensitive photos. Once you move a photo to the Locked Folder, it disappears from your main photo library. It won’t show up as you scroll through your photos, and it won’t be visible to anyone you share your device with.
Setting up the Locked Folder is a straightforward process. You simply need to navigate to the Utilities section in Google Photos, select Locked Folder, and set up your passcode. Once the Locked Folder is set up, you can move photos to it by selecting them and choosing the “Move to Locked Folder” option.
But the Locked Folder isn’t just about storing sensitive photos. It’s also about giving you peace of mind. With the Locked Folder, you can rest assured knowing that your sensitive photos are safe and secure, accessible only by you.
Now, we’ll provide a detailed, step-by-step guide on how to set up and use the Locked Folder in Google Photos on your iPhone. We’ll also share some tips and best practices to help you make the most of this powerful privacy tool.
Stay tuned as we delve deeper into the world of Google Photos and its commitment to privacy through the Locked Folder feature.
Remember, in the digital world, privacy is not a luxury, but a necessity. And with the Locked Folder in Google Photos, you’re one step closer to achieving it.
Step-by-Step Guide to Set Up Locked Folder in Google Photos on iPhone
Setting up the Locked Folder in Google Photos on your iPhone is a simple and straightforward process. Here’s a step-by-step guide to help you get started:
- Open Google Photos: Start by opening the Google Photos app on your iPhone. Make sure you’re signed in to your Google account.
- Navigate to Utilities: Tap on the Library tab at the bottom right of the screen. Then, tap on Utilities.
- Select Locked Folder: In the Utilities section, you’ll find an option called Locked Folder. Tap on it.
- Set Up Locked Folder: If you’re setting up the Locked Folder for the first time, you’ll be prompted to set up a passcode. This passcode will be used to access the Locked Folder, so make sure it’s something you can remember but hard for others to guess.
- Confirm Passcode: You’ll be asked to confirm your passcode. Enter the same passcode again.
- Set Up Complete: Once you’ve confirmed your passcode, your Locked Folder is set up and ready to use. You can now start moving photos to the Locked Folder.
Remember, the photos you move to the Locked Folder will disappear from your main photo library. They won’t show up as you scroll through your photos or share your device with others. To access these photos, you’ll need to open the Locked Folder and enter your passcode.
Now, we’ll guide you through the process of using the Locked Folder once it’s set up. We’ll provide step-by-step instructions, tips, and best practices to help you make the most of this powerful privacy tool.
Stay tuned as we delve deeper into the world of Google Photos and its commitment to privacy through the Locked Folder feature.
Remember, in the digital world, privacy is not a luxury, but a necessity. And with the Locked Folder in Google Photos, you’re one step closer to achieving it.
How to Use Locked Folder in Google Photos on iPhone
Now that you’ve set up the Locked Folder in Google Photos on your iPhone, it’s time to start using it. Here’s a step-by-step guide:
- Open Google Photos: Start by opening the Google Photos app on your iPhone.
- Select Photos: Navigate to the photos you want to move to the Locked Folder. You can select multiple photos at once.
- Move to Locked Folder: Once you’ve selected the photos, tap on the “More” icon (three vertical dots) at the top right of the screen. From the drop-down menu, select “Move to Locked Folder”.
- Confirm Move: You’ll be asked to confirm the move. Remember, once you move photos to the Locked Folder, they will disappear from your main photo library and won’t be visible to anyone you share your device with.
- Access Locked Folder: To access the photos in the Locked Folder, go to the Utilities section in Google Photos and select Locked Folder. You’ll be asked to enter your passcode.
- View Photos: Once you’ve entered your passcode, you can view the photos in the Locked Folder. These photos will remain here until you decide to move them back to the main library.
Remember, the Locked Folder is a powerful privacy tool. It allows you to control who sees your sensitive photos, ensuring that your private moments stay private.
FAQ
Is Google Photos locked folder private?
Yes, the Locked Folder in Google Photos is private. It’s a secure, password-protected space where you can store sensitive photos away from your main photo library.
Is Google Photos safe for private photos?
Yes, Google Photos is considered safe for storing private photos. It uses encryption to protect your photos and also offers features like the Locked Folder for added privacy.
Can Apple see your hidden photos?
No, Apple does not have access to your hidden photos. They are stored locally on your device and are not uploaded to iCloud.
What happens to photos in locked folder?
Photos in the Locked Folder are hidden from your main photo library. They won’t appear when you scroll through Google Photos or when you share your device with others.
Can photos in locked folder be recovered?
Yes, photos in the Locked Folder can be recovered. If you delete a photo from the Locked Folder, it will be moved to your trash, where it will stay for 60 days before being permanently deleted.
Is Google files Safe folder safe?
Yes, the Safe Folder in Google Files is a secure space where you can store sensitive files. It’s protected by a 4-digit PIN and files moved to the Safe Folder are not visible to other apps.
Can you lock Google Photos on iPhone?
Yes, you can use the Locked Folder feature in Google Photos on iPhone to secure your sensitive photos.
What is the difference between locked folder and secure folder?
The Locked Folder in Google Photos is a space to store sensitive photos, while a Secure Folder (like the one offered by Samsung) is a broader feature that allows you to store not just photos, but also apps, files, and documents in a secure, password-protected space.
Can anyone see my photos on my iPhone?
No, unless you’ve shared your device or your photos with someone, others cannot see your photos on your iPhone.
How do I make sure my Google Photos are private?
To ensure your Google Photos are private, you can adjust your sharing settings, use features like the Locked Folder, and regularly review and manage your photo library.
Can someone see my photos in Google Photos?
No, others cannot see your photos in Google Photos unless you choose to share them. Google Photos offers various privacy controls, including the ability to share individual photos, albums, or even your entire library with others.
Conclusion: Embrace Privacy with the Locked Folder in Google Photos
In conclusion, the Locked Folder in Google Photos is a powerful tool that puts you in control of your digital privacy. By providing a secure, password-protected space for your sensitive photos, Google Photos ensures that your private moments stay private.
Setting up and using the Locked Folder is a straightforward process. With our step-by-step guide, you can easily set up and start using the Locked Folder on your iPhone. Remember, the photos you move to the Locked Folder will disappear from your main photo library, providing an extra layer of privacy.
In the digital world, privacy is not a luxury, but a necessity. And with the Locked Folder in Google Photos, you’re one step closer to achieving it. So, embrace the power of privacy and start using the Locked Folder in Google Photos today.

